Heads up! To view this whole video, sign in with your Courses account or enroll in your free 7-day trial. Sign In Enroll
Preview
Start a free Courses trial
to watch this video
In this video we'll make our first changes to the simple layout file that was automatically created for us.
Related Discussions
Have questions about this video? Start a discussion with the community and Treehouse staff.
Sign upRelated Discussions
Have questions about this video? Start a discussion with the community and Treehouse staff.
Sign up
Okay, that's enough about the tools.
0:00
Let's do something.
0:02
We'll talk more about the tools
as we work through this project.
0:04
I'll make sure you understand everything
you need to know to build this app.
0:07
There are two main things we
will work with in Android Apps.
0:11
The first is the layout of the screen.
0:14
For this, we'll use the design
view which allows us to
0:17
visually manipulate the layout
by dragging and dropping.
0:20
It's pretty helpful.
0:23
We can also manipulate the layout and
code,
0:24
and we'll see how to do that as well.
0:26
The other main thing we'll work on is
how our app works behind the scenes.
0:29
That's where we write Kotlin code that
does things like pick a random fun fact.
0:33
I'll explain everything you need to know,
but
0:38
if you get confused remember to
check the teacher's notes for help.
0:40
And feel free to ask about
anything in the community.
0:44
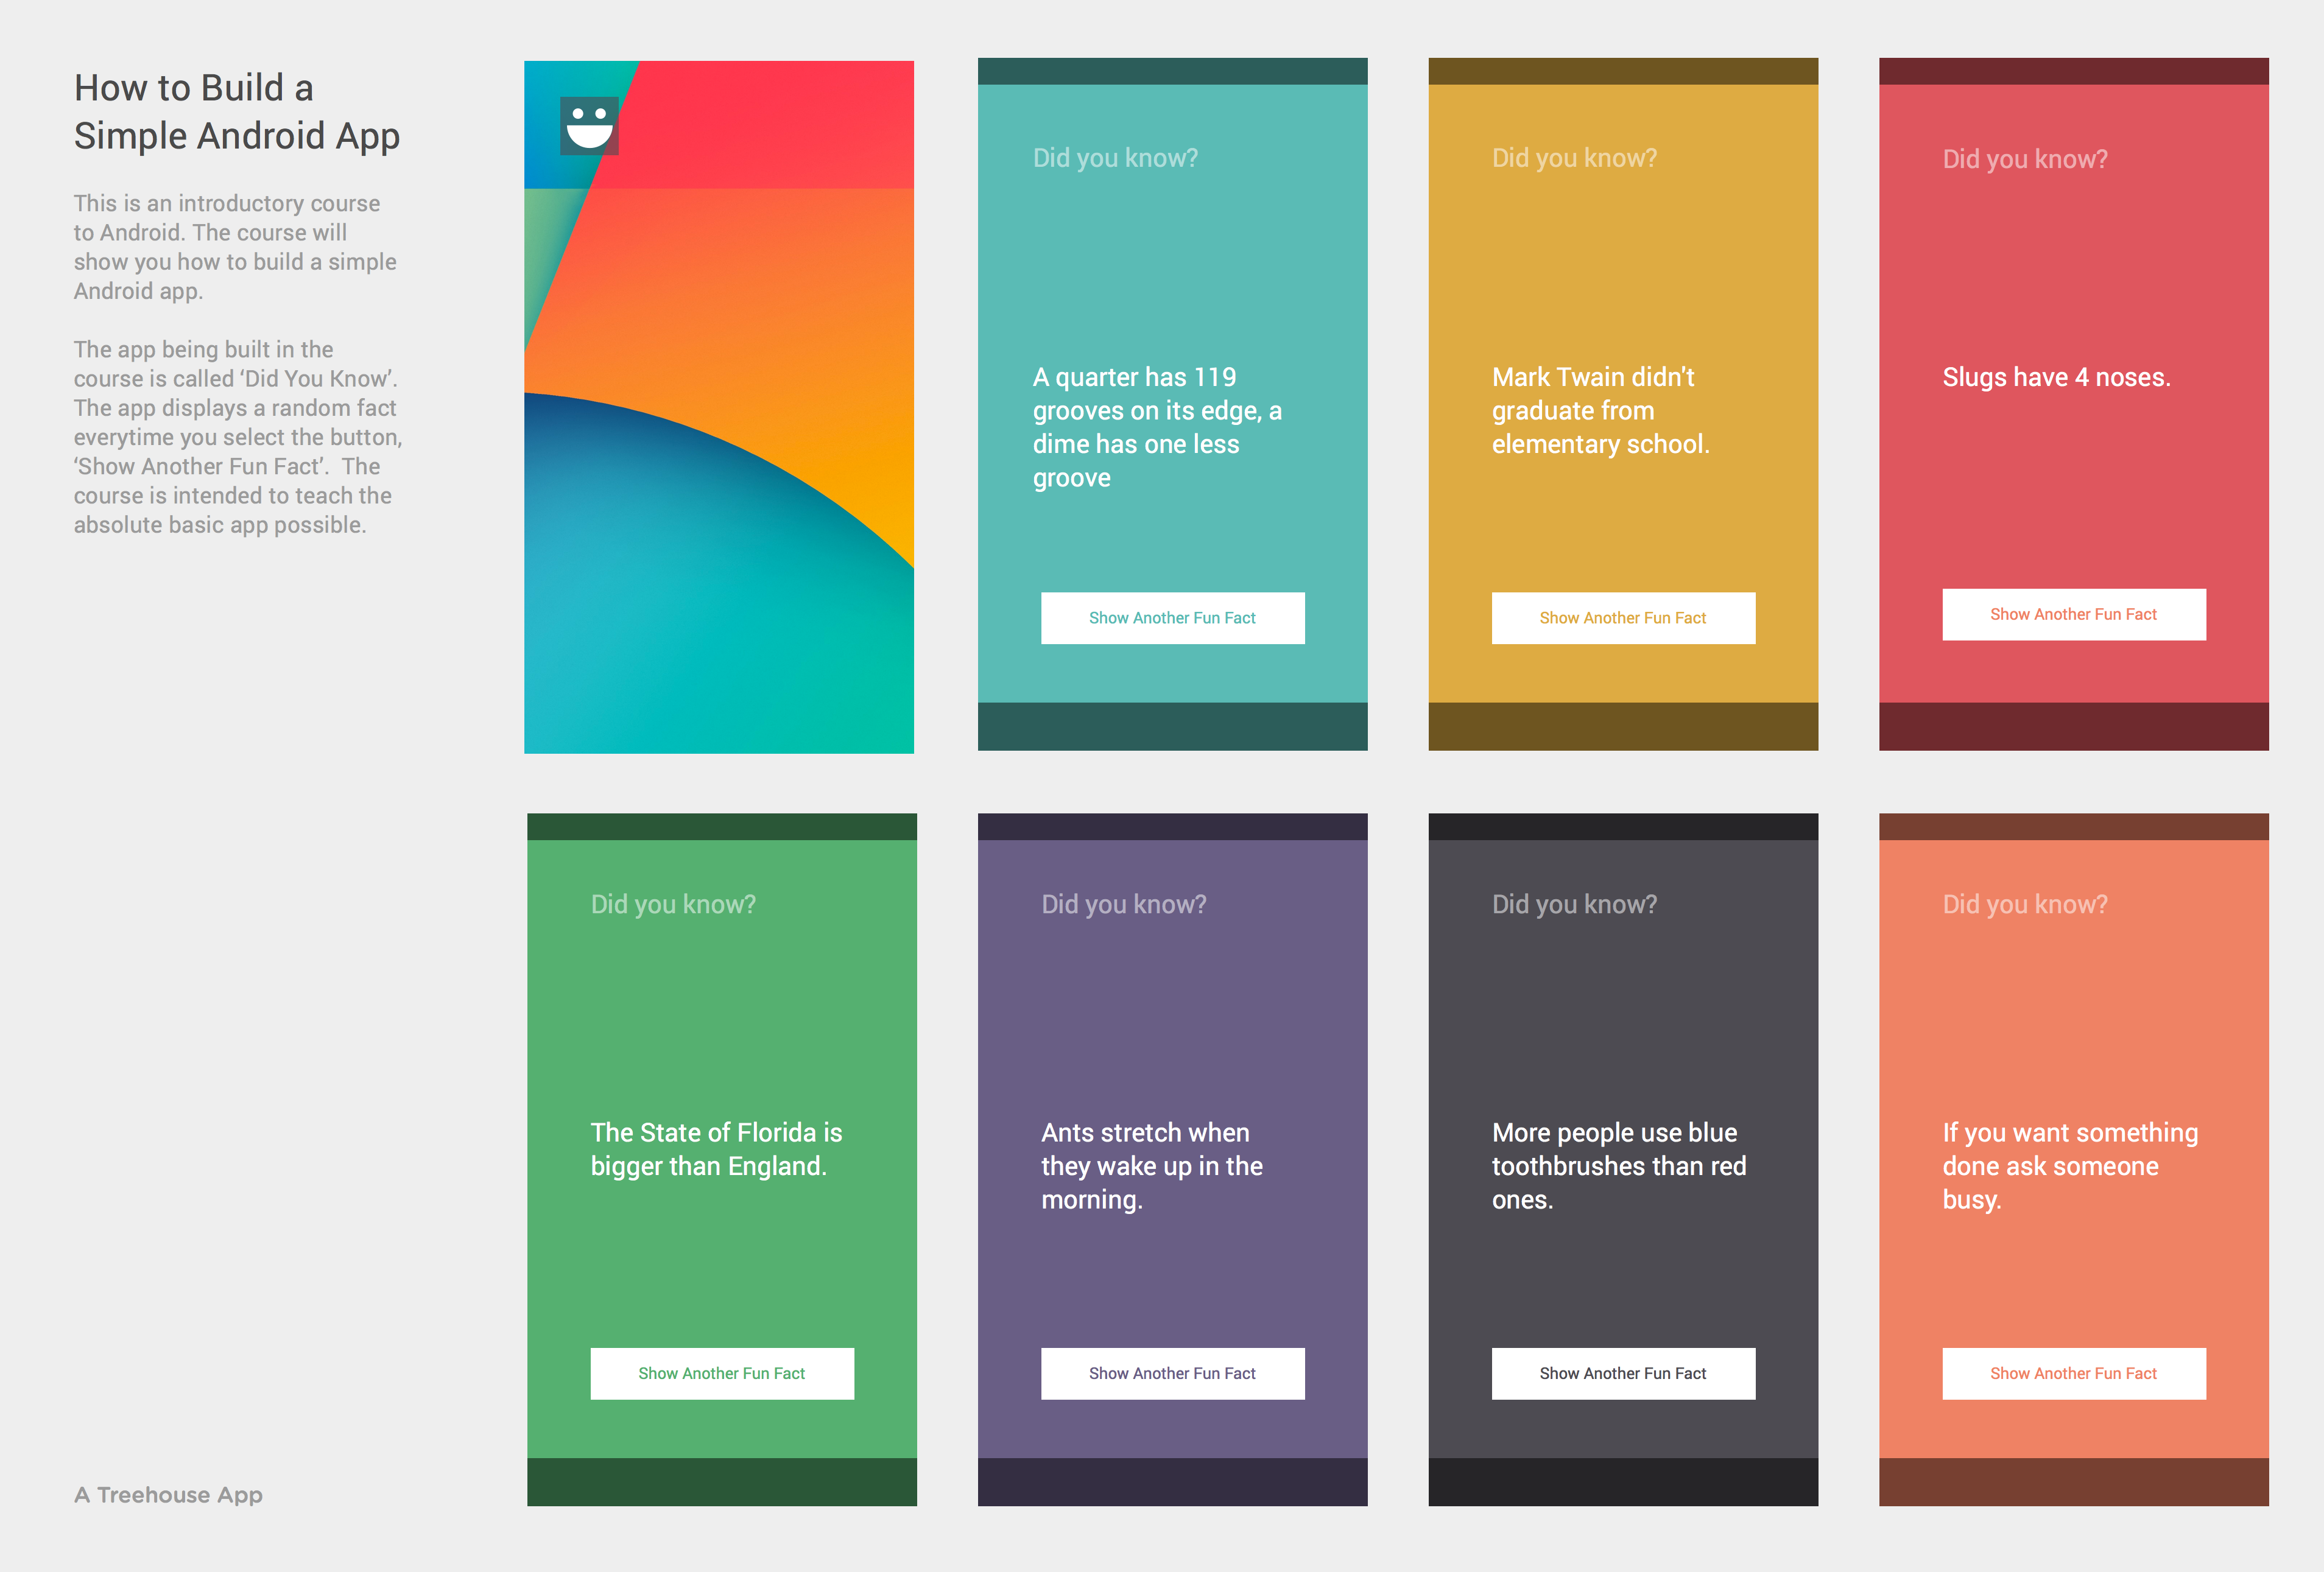
Take a look at these mock ups from
one of our designers at Treehouse.
0:48
You can find this image
in the teachers notes.
0:51
This shows what the app should
look like when we're finished.
0:54
We'll have text at the top that says,
did you know.
0:57
Then we'll have one of the fun
facts displayed in the middle, and
1:01
then at the bottom we have
a button to show another fun fact.
1:04
Notice how we´re also going to change
the background color for each fact.
1:08
We´ll even give our app
an icon to match this one.
1:12
This app is relatively simple,
but it´s still a lot of work.
1:16
We´re going to tackle it piece by
piece to make it easy to understand.
1:20
Let´s start by making
the simplest version possible,
1:24
this is something that
developers do all the time.
1:27
Starting with something simple, let's
just make sure the app works as expected.
1:30
Then we can refine it and
make it look more and
1:34
more like what we see
here in the mock ups.
1:37
We'll start by changing the layout to
show the, did you know, text at the top.
1:40
Then we'll build on this, piece by piece,
to turn it into the full app we see here.
1:44
Before we get started, just to make
things a little easier to see,
1:50
I'm going to put this
into full screen mode.
1:54
We should already have
our layout file open.
1:57
Our app is created with
just one simple screen, and
2:00
the layout of that screen
is defined right here.
2:03
I mentioned that this code is in
a language called XML, which stands for
2:06
extensible markup language.
2:11
If you're familiar with HTML,
you'll notice it has some similarities.
2:14
The good news is there's a design
view of this layout as well.
2:18
Remember that we can switch back and
forth between XML, text, and
2:21
the design view by clicking
on these tabs down here.
2:26
Changes we make to the design view
update the XML code and vice versa.
2:30
It's up to us to choose
how to edit the file.
2:34
Often it maybe easier to work visually
like this, but sometimes we might
2:38
want them more precise control we get
by editing the XML code directly.
2:43
All right, so
we already have a TextView on our screen.
2:48
Let's change that TextView to say,
did you know, just like in the mock ups.
2:51
Click directly on the Hello World
to select it, and
2:56
on the right we can see a bunch
of properties for this TextView.
2:59
In the middle we can find
a property called text, and
3:04
it's set to Hello World,
just like we see in the preview.
3:08
Let's delete that and type,
did you know, With a question mark.
3:12
Hit Enter and there we go.
3:20
Now if we flip to the XML by using
the Text tab, there's our new text.
3:22
We've seen what happens when we
have errors in our code, but this
3:30
yellowish highlighting is what happens
when we have something called a warning.
3:34
Warnings aren't as severe as errors.
3:38
We don't have to fix warnings,
but we probably should.
3:41
Errors we do have to fix
before we run the app.
3:44
Now this warning is telling us that
we should use a string resource
3:47
instead of hard coating the string.
3:51
We'll cover how to use string
resources in a later project, so
3:53
we're going to ignore this warning.
3:56
But I encourage you to try and
fix it on your own if you're curious.
3:58
And if you want to ask for
help in the community, please do.
4:02
Also before we go any further, there's one
more change we need to make in our layout.
4:05
Instead of using a constraint layout,
we want to use a relative layout.
4:09
So up there at the top let's delete
this constraint layout bit and
4:14
replace it with RelativeLayout.
4:20
Then let's also delete these
four constraint lines, and
4:24
make sure not to delete the closing tag.
4:28
Awesome, finally let's talk about saving.
4:32
Android Studio will save everything for
you automatically.
4:37
But if you want to explicitly
save a project you can go File,
4:41
Save All or use Command S for
MAC or Control S for Windows.
4:46
All right, nice work.
4:52
Let's see if you can make that
same change in just the XML.
4:54
You need to sign up for Treehouse in order to download course files.
Sign upYou need to sign up for Treehouse in order to set up Workspace
Sign up